How Poplight Installs in Seconds
How Poplight Installs in Seconds

1
Peel
Get ready to stick the Poplight base onto the wall. Don't worry! 1 pair of tape comes ready to go on each Poplight.
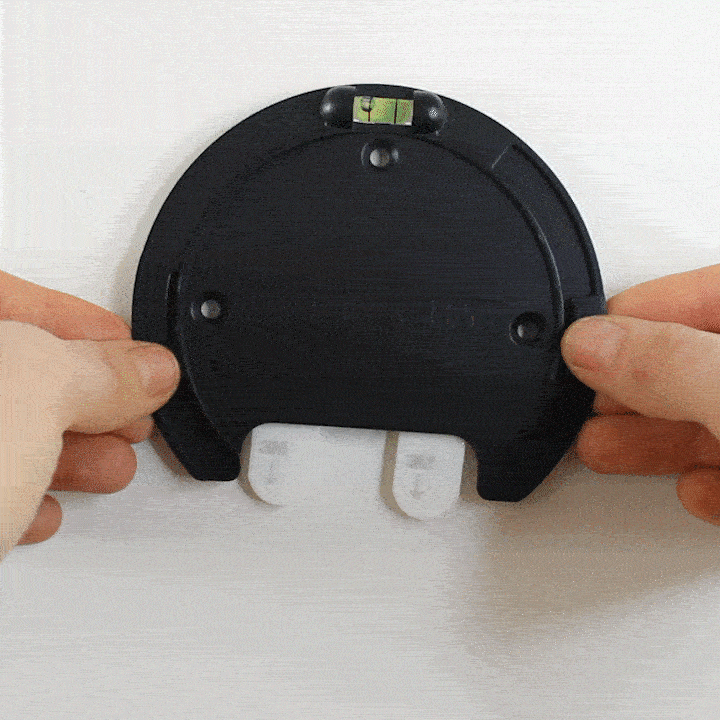
2
Level & Stick
Use the built in level on the base to get the base *perfect* on your wall!

3
Swivel
Simply swivel Poplight onto the base. That's it! You just installed a rechargeable wall sconce in seconds.
 Rated 4.9 based on 100+ reviews
